Di tutorial kali ini saya akan membahas tentang cara installasi FEMP Stack di FreeBSD 13
Nginx Setup
Install Nginx
pkg install nginx
Enable Nginx
sysrc nginx_enable="YES"
Mulai service nginx
service nginx start
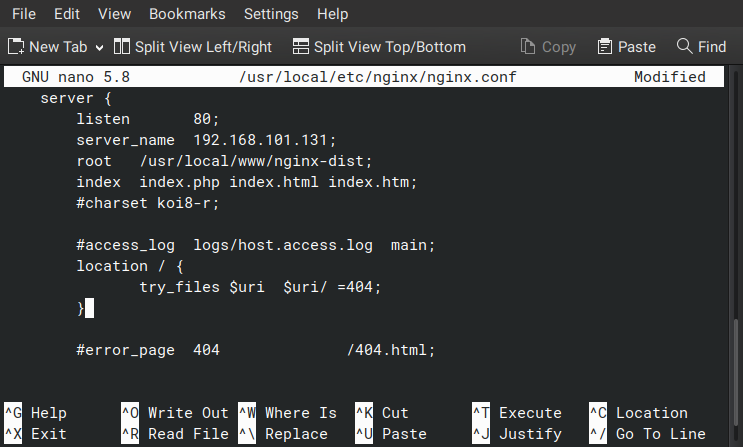
Konfigurasi Nginx
file konfigurasi terletak di /usr/local/etc/nginx/nginx.conf
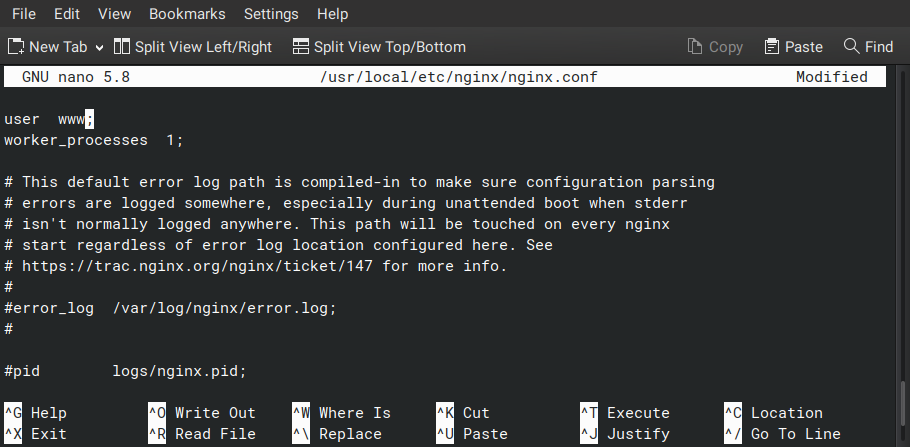
nano /usr/local/etc/nginx/nginx.conf
ubah user nobody menjadi
user www;
ubah worker_processes menjadi jumlah core cpu (disini saya 1)
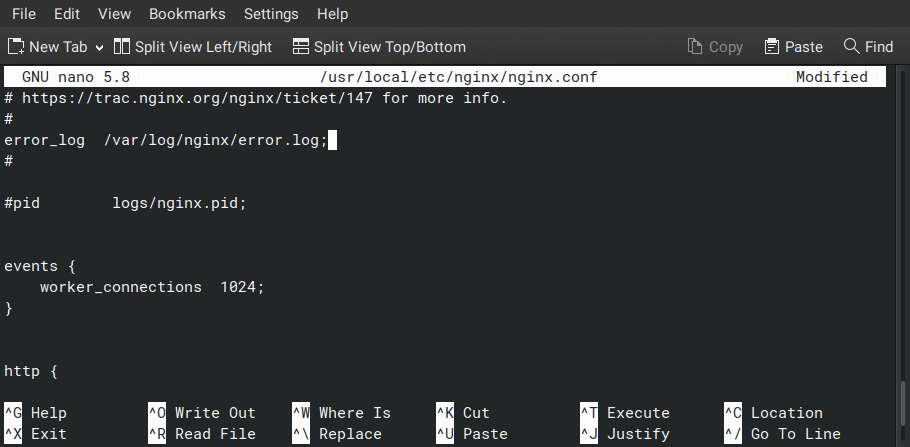
Hilangkan komentar untuk error log
error_log /var/log/nginx/error.log;
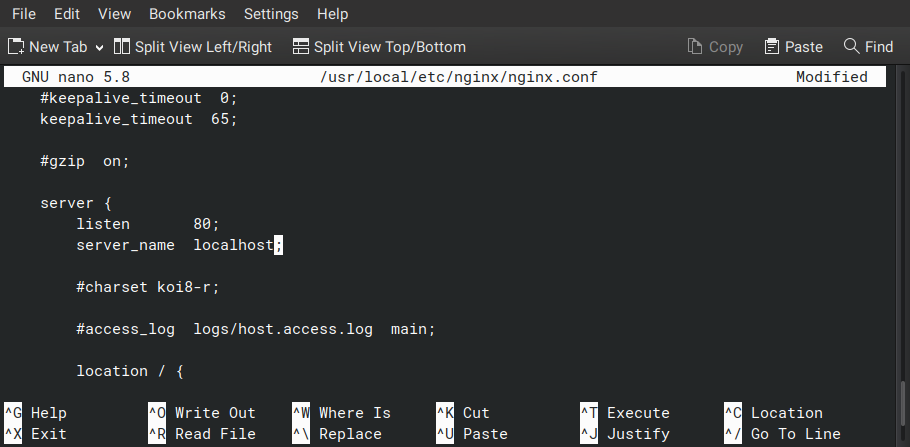
ubah server_name localhost menjadi IP/Domain
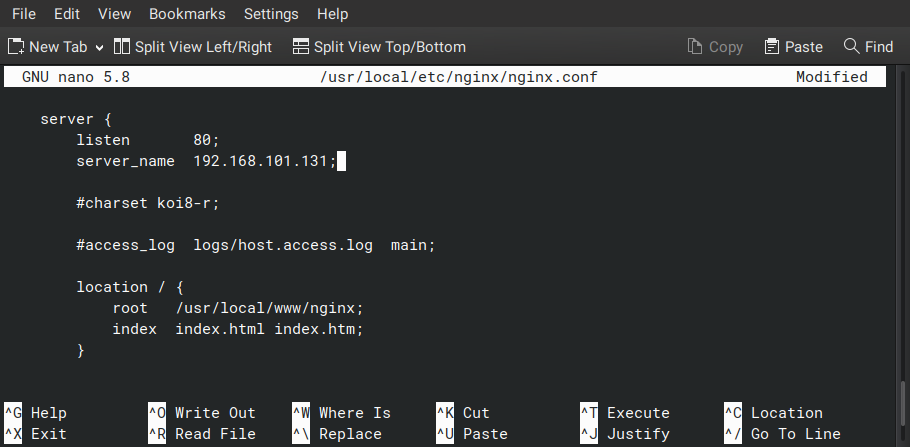
pada index tambahkan index.php
ganti isi location / menjadi
location / {
               try_files $uri  $uri/ =404;
        }
lalu pindah root dan index ke luar dari location /
Hilangkan komentar pada lokasi php
ubah menjadi
  location ~ \.php$ {
            try_files $uri =404;
            fastcgi_split_path_info ^(.+\.php)(/.+)$;
            fastcgi_pass   unix:/var/run/php-fpm.sock;
            fastcgi_index  index.php;
            fastcgi_param  SCRIPT_FILENAME $request_filename;
            include        fastcgi_params;
        }
Setup MariaDB
Install MariaDB
pkg install mariadb103-{server,client}
Enable dan Mulai Services Mysql
sysrc mysql_enable="YES"
service mysql-server start
Konfigurasi Root Password
dengan perintah mysql_secure_installation
root@freebsd:~ # mysql_secure_installation

NOTE: RUNNING ALL PARTS OF THIS SCRIPT IS RECOMMENDED FOR ALL MariaDB
      SERVERS IN PRODUCTION USE!  PLEASE READ EACH STEP CAREFULLY!

In order to log into MariaDB to secure it, we'll need the current
password for the root user.  If you've just installed MariaDB, and
you haven't set the root password yet, the password will be blank,
so you should just press enter here.

Enter current password for root (enter for none):
OK, successfully used password, moving on...

Setting the root password ensures that nobody can log into the MariaDB
root user without the proper authorisation.

Set root password? [Y/n] y
New password:
Re-enter new password:
Password updated successfully!
Reloading privilege tables..
 ... Success!


By default, a MariaDB installation has an anonymous user, allowing anyone
to log into MariaDB without having to have a user account created for
them.  This is intended only for testing, and to make the installation
go a bit smoother.  You should remove them before moving into a
production environment.

Remove anonymous users? [Y/n] y
 ... Success!

Normally, root should only be allowed to connect from 'localhost'.  This
ensures that someone cannot guess at the root password from the network.

Disallow root login remotely? [Y/n] y
 ... Success!

By default, MariaDB comes with a database named 'test' that anyone can
access.  This is also intended only for testing, and should be removed
before moving into a production environment.

Remove test database and access to it? [Y/n] y
 - Dropping test database...
 ... Success!
 - Removing privileges on test database...
 ... Success!

Reloading the privilege tables will ensure that all changes made so far
will take effect immediately.

Reload privilege tables now? [Y/n] y
 ... Success!

Cleaning up...

All done!  If you've completed all of the above steps, your MariaDB
installation should now be secure.

Thanks for using MariaDB!
PHP Setup
Install PHP
pkg install php74 php74-{extensions,mysqli,mbstring,zlib,curl,gd,json}
Konfigurasi PHP-FPM
Copy file example php.ini yang berada di /usr/local/etc/
cp /usr/local/etc/php.ini{-production,}
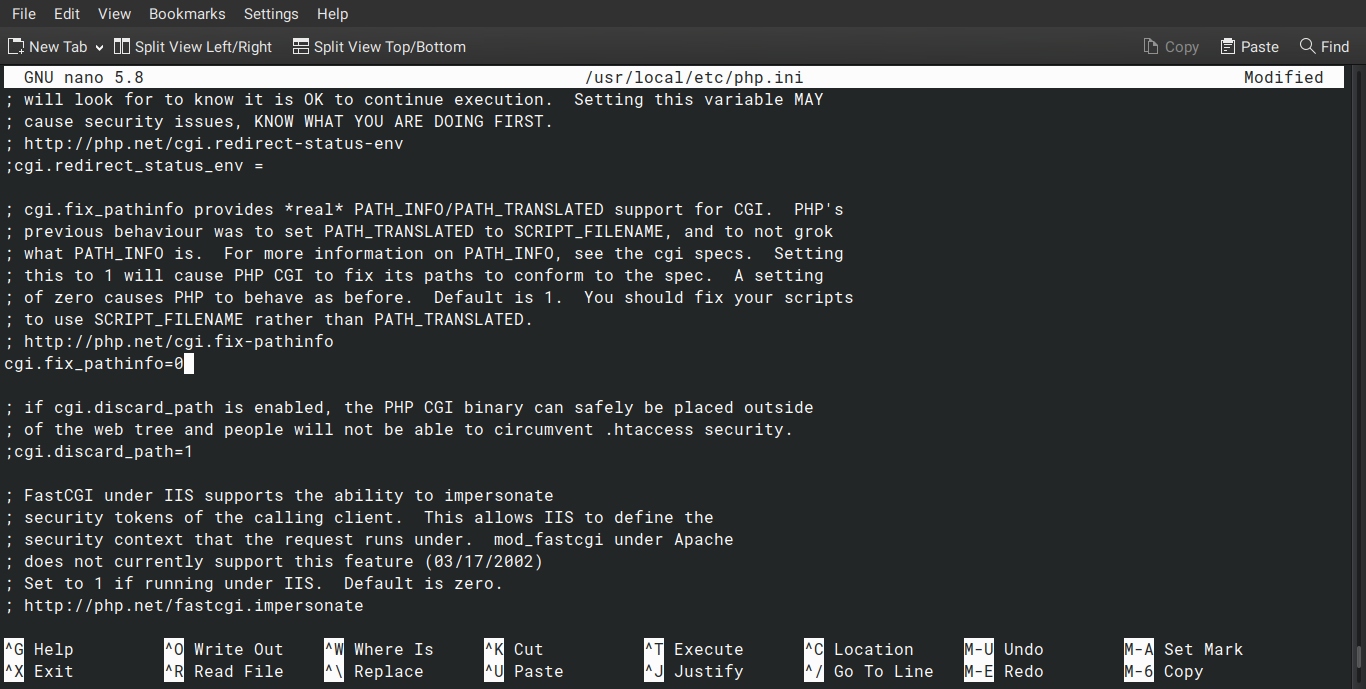
Edit file php.ini
nano /usr/local/etc/php.ini
ubah nilai cgi.fix_pathinfo=1 menjadi 0 agar php tidak mengeksekusi file berformat lain
Edit file /usr/local/etc/php-fpm.d/www.conf
nano /usr/local/etc/php-fpm.d/www.conf
Ubah permission listen unix socket menjadi
listen.owner = www
listen.group = www
listen.mode = 0660
Ubah tcp socket dari
listen = 127.0.0.1:9000
menjadi
listen = /var/run/php-fpm.sock;
Enable dan Mulai Service php-fpm
sysrc php_fpm_enable="YES"
sevice php-fpm start
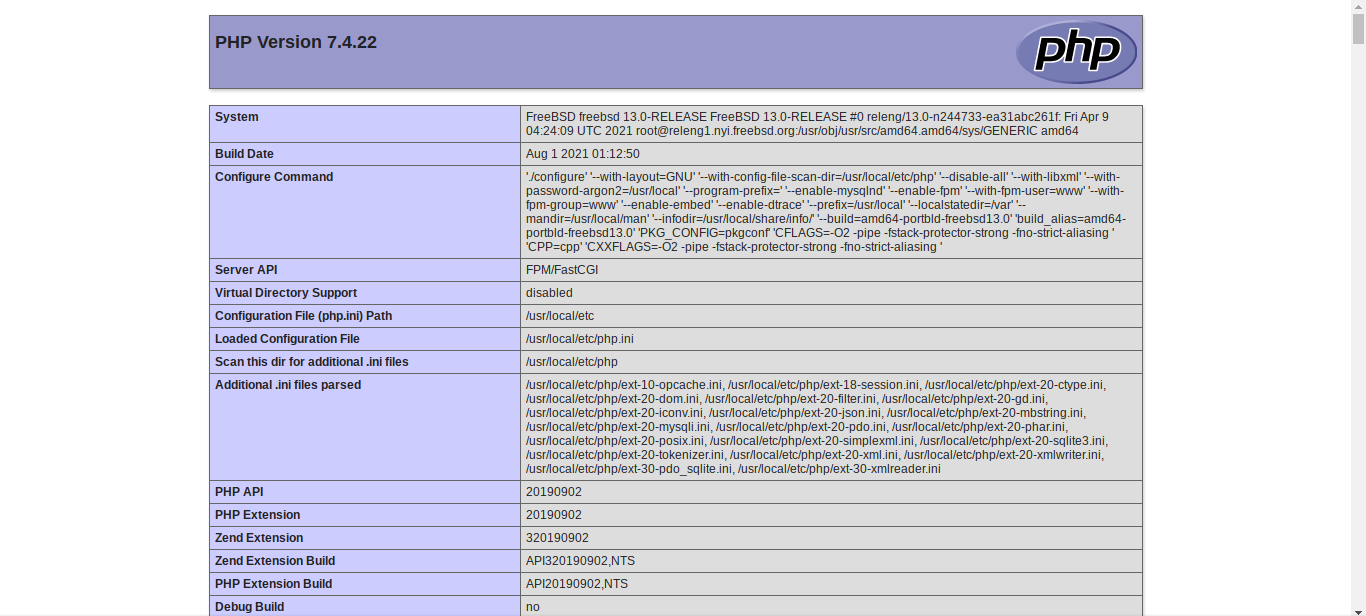
Lalu kita test dengan membuat file php
nano /usr/local/www/nginx-dist/info.php
<?php phpinfo(); ?>
Lalu akses di browser misal http://192.168.101.131/info.php
Jika berhasil maka akan muncul tampilan seperti ini
Be First to Comment